GET WILD WITH SAVINGS! 25% OFF ORDERS $60+ USE CODE: 25WNW60 | FREE SHIPPING ON ORDERS $25+
HOW TO APPLY BLUSH, BRONZER & HIGHLIGHTER
Reading Time: 9 minutes
It’s time to get back to basics on the three staples of any face makeup kit: blush, bronzer, and highlighter. Maybe it’s your first time taking on this tried and true trifecta, or maybe you just need a refresher on how to create a subtle and sophisticated makeup look. Either way, we’ll take you through how to apply blush, bronzer, and highlighter to get that good-looking glow.
Let’s get started.
Beauty School 101: The Basics of Blush, Bronzer & Highlighter
Wear Them Together
Often we hear questions like, ‘can you use bronzer and blush together?’ or ‘can you wear blush and highlighter at the same time?’ And the answer is yes, yes, and more yes! Not only can you wear them together, you should wear them together! If you are looking for a truly fab but simple makeup look, these three make a lovely pairing.
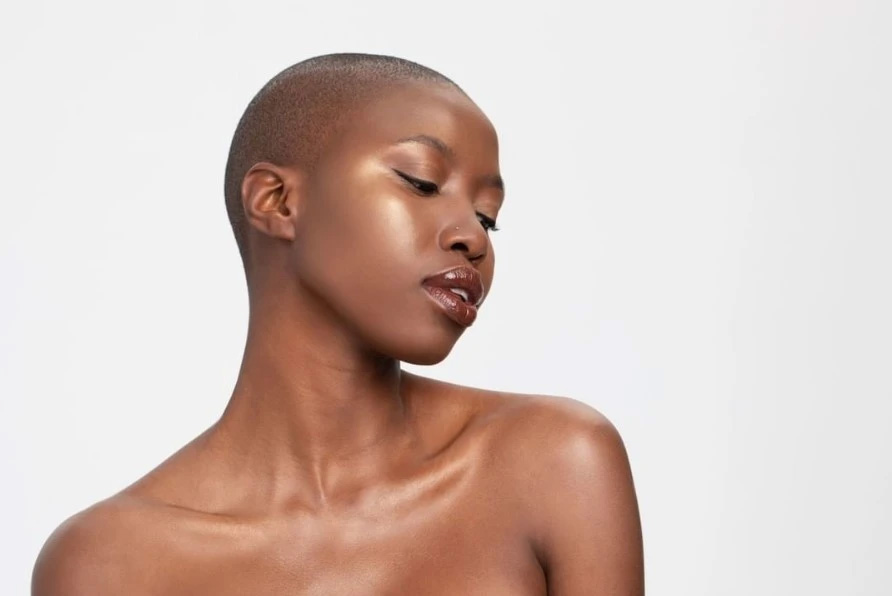
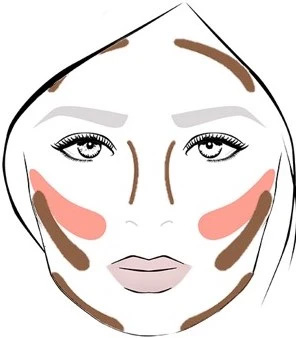
If you are using bronzer, blush, and highlighter, just make sure you apply them in the right order. Bronzer goes on first, then blush, then highlighter. Bronzer will be just below your cheekbone, blush on your apples, and highlighter at the top on the upper cheekbone. As an optional final step, you can dust some shimmer bronzer or highlighter on your collarbone for extra full-body definition.
1
Bronzer: to shade and contour
Make a little kissy face in the mirror to highlight your highpoints. Apply bronzer with a flat top brush on the hollows of your cheeks, just below the cheekbone and following the angle of your jawline.
2
Blush: for a lovely flush
Sweep blush just above the bronzer on the apples of your cheeks and up to your outer eye. Then blend, blend, blend before applying highlighter.
3
Highlight: get that glow
Attract the eyes to your cheekbones by applying highlighter just above the blush. On the upper cheekbone. Dab a little on the middle of your nose, cupid’s bow, inner eye, and above the brow for a little extra ooh-la-la!
How to Apply Bronzer for Beginners
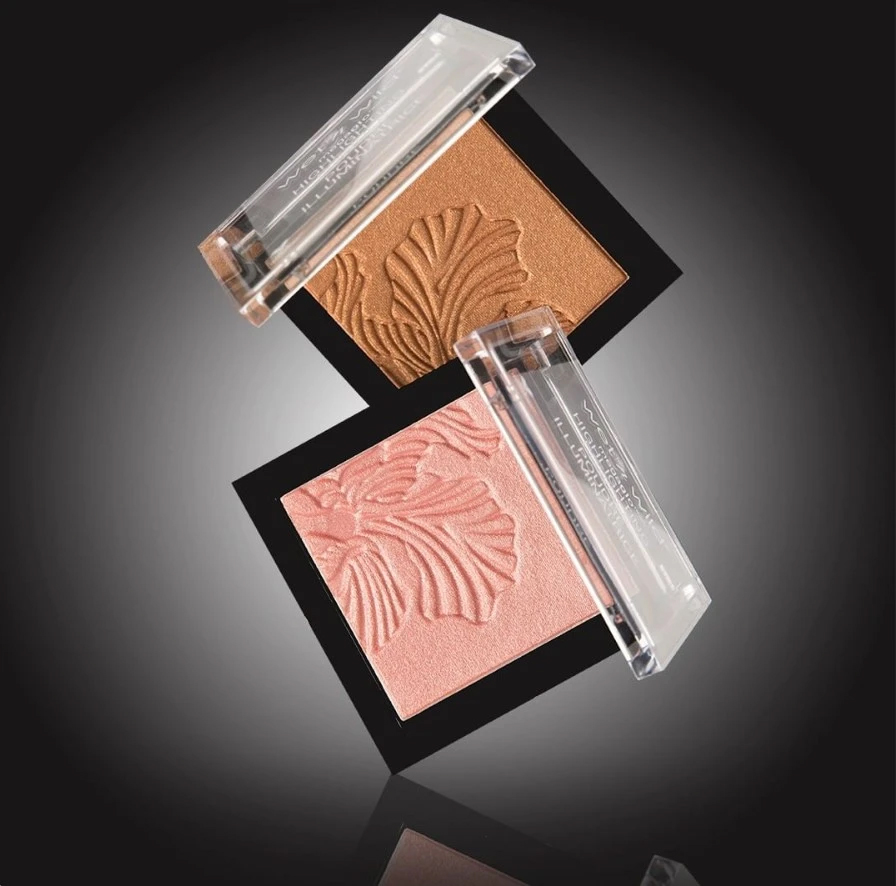
Bronzer is used to contour, sculpt, and define, or to simply create the aura of a sun-bathing beauty! Your bronzer should be about two shades darker than you are, depending on how dramatic you want your tan to look. We recommend our long-wearing Color Icon bronzer, available in fair and deep shades.
When it comes methods for applying bronzer, you have more than a few options. Really, it comes down to what kind makeup look you are going for. Are you looking to sculpt and define your cheekbones for an Insta-perfect selfie? If so, then simple contouring is the way to go. Want to look like you just got back from a beach-vacay in the Bahamas? Striping will give you that sun-kissed goddess vibe.
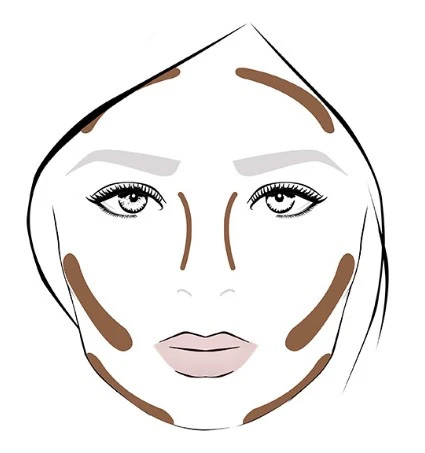
Contouring: For a Sculpted Look
Contouring consists of shading the areas that you want to recede, then highlighting prominent areas of the face that you want to stand out. Dust your collarbone for a little extra body definition.
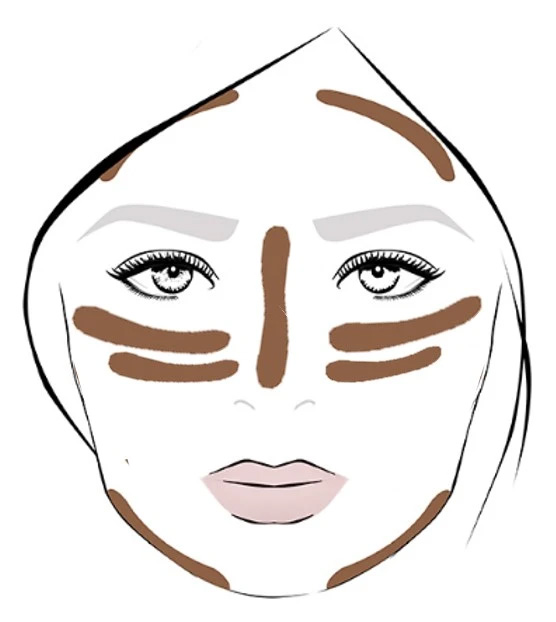
Striping: For a Bronzed-All-Over Look
Striping creates a bronzed-everywhere look, as if you’ve really had some fun in the sun. Imagine a natural “stripe” of bronze across the high planes of your face. Finish off by dusting a layer on your neck and collarbone!
How to Contour with Bronzer: Simply bronze and shade the areas you want to recede, such as just below the cheekbone, the sides of your nose, your jawline and hairline pictured below. We recommend applying with a brush, then blending out. Then, use a highlighter to emphasize the high planes of your face, such as the your the apples of your cheeks, your nose, and your browbone. Highlighting will bring all of those features into the foreground. If you don’t have a highlighter, you can always use two shades of bronzer, with the darker for shading and the lighter for highlighting.
Sunkissed Striping with Bronzer: To create an all-over bronze, darken your complexion from cheekbone to cheekbone in a straight line with bronzer. Using a flat-top brush, apply bronzer on upper cheeks and across bridge of nose, blending from left to right. This creates a “stripe” across the high planes of your face for a natural sun kissed look. Add bronzer to your jawline and hairline in a striping motion to complete the look. Voila – you’re a bronzed babe.
Watch our video tutorial to learn how to master this technique and make your skin shine like summer all year long!
How to Apply Blush for Beginners
Blush should be your go-to tool for creating a sexy, flushed look that leaves the crowds asking, “Who is she?” Use it to create a sheer wash of color that glows all over. You can glam it up by pairing with highlighter, tan it up by applying together with bronzer, or let it shine all on its own for an understaded natural makeup look.
As always, make sure choose the best shade of blush for you. Brighter blushes will shine on darker skin tones, but may overpower light skin tones. For lighter skin tones, choose a more muted shade closer to your actual skin tone. We recommend our blush makeup stick for precise application or our signature Color Icon pressed powder blush for buildable beauty.
Where to Apply Blush: Pucker up! If you make a kissy face in the mirror, the area of your face where you are aiming to apply blush will show in high-definition. Apply blush to the apples of your cheeks and sweep lightly upward to the sides of your eyes to create a natural-looking flush.
If you want to create a rosy look, you can also apply blush to your hairline and jawline like you would for contouring. To really peach up your persona, you can sweep blush down the middle of your nose like you would for highlighting. But, using blush and bronzer together, using blush and highlighter together, or all three at the same time will add the most depth and interest to your facial structure.
Use Blush and Highlighter at the Same Time
First, apply blush on the apples of your cheekbones, then finish off with highlighter just above the blush on the upper cheekbone. Our blush & highighter duo is the perfect tool!
Use Blush and Bronzer Together
Start by contouring with bronzer as your base, paying attention to the hollows of your cheeks, jawline, and hairline. Then flush your cheekbones with blush just above the bronzer to finish.
Take your game from beginner beauty to full-on makeup pro, watch our blush makeup tutorial. In this fab video tutorial, World of Wonder’s wonderful Raven Hunty teaches you how to apply blush powder for an absolutely stunning natural look!
How to Apply Highlighter for Beginners
Highlighter is used to create a glowing goddess look. The general rule is to dust highlighter on the high points of your face to make your features glow! You can even apply it to your neck and collarbone for a luminous full body glow.
Contouring: For a Sculpted Look
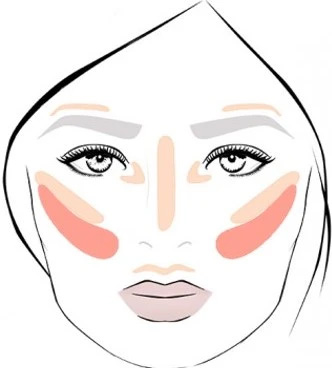
Where to Apply Highlighter
Attract eyes to your best facial features by applying highlighter in circular motions directly on the cheekbone. Sweep some highlighter on the middle of your nose, cupid’s bow, inner eye, and above the brow to complete that oh-my-glow look!
How to Highlight & Contour
Get catwalk-ready cheekbones by contouring with bronzer along the hollows of your cheeks, jawline, and hairline. Then highlight your cheekbones, nose, cupid’s bow, and browbone. Try this highlight & contour stick for the perfect all in one tool.
When choosing your shade, you’ll want to find a highlighter that is about two shades lighter than you are. The result will be a natural-looking glow that easily blends with your complexion while adding definition. But, with four main kinds of highlighter, there are plenty of other options to consider. The four common types of highlighter: loose or pressed highlighting powder, jelly highlighter, highlighter makeup sticks, and liquid highlighter.
Highlighting powder: As the most common form of highlighter, baked highlighting powder is a staple of any makeup kit. Highlighting powder is excellent for blending with other makeup such as blush or bronzer. Choosing a baked formula ensures the powder goes on smooth and the light hits your cheek features at the right angle, every time. If you like to have a variety of colors to choose from, highlighting powders are preferable to other highlighters because they are easily available as highlighting powder palettes.
Jelly Highlighter: This fun variety of highlighter has a jelly texture that transforms into a powdery finish. Jelly highlighter is basically a cross between cream and liquid highlighter with a lighter-weight finish. Jelly highlighter glides on beautifully for buildable coverage. You can mix jelly highlighter with foundation, primer, or moisturizer for a subltle and sexy pearl sheen finish.
Highlighter Makeup Sticks: Also known as a cream highlighter, highlighting makeup sticks have a velvety, creamy application. With a cream to powder formula, they are easy to blend onto skin. As with any makeup stick, cream highlighter sticks are convenient as can be, offering easy, precise application in a highly portable package!
Liquid Highlighter: The liquid variety of highlighter is buildable, intense, and highly pigmented. Often offered in moisturizing varieties, liquid highlighter can help smooth out uneven skin texture.
With any of these highlighter varieties, the principles of application are the same. For more highlighter application tips, watch Raven Hunty use highlighting powder as full face makeup to simplify your makeup routine. According to Raven, baked highlighting powder is everything you need to get a stunning overall glow. Find out for yourself with the highlighter makeup video tutorial below!
We use cookies on our website to give you the most relevant experience by remembering your preferences and repeat visits. By clicking “Accept”, you consent to the use of ALL the cookies. However you may visit Cookie Settings to provide a controlled consent.
This website uses cookies to improve your experience while you navigate through the website. Out of these cookies, the cookies that are categorized as necessary are stored on your browser as they are essential for the working of basic functionalities of the website. We also use third-party cookies that help us analyze and understand how you use this website. These cookies will be stored in your browser only with your consent. You also have the option to opt-out of these cookies. But opting out of some of these cookies may have an effect on your browsing experience.